m (→Guide) |
No edit summary |
||
| Line 24: | Line 24: | ||
**You should have no problem getting there fast enough, but if you are too slow getting there (possible disconnect, maybe AFK, or if you died once already), the mantid groups could start getting [http://wiki.fbgmguild.com/Aggro#Good_vs_Bad_Aggro bad aggro], making them unable to be balled, slowing the run down, or failing. |
**You should have no problem getting there fast enough, but if you are too slow getting there (possible disconnect, maybe AFK, or if you died once already), the mantid groups could start getting [http://wiki.fbgmguild.com/Aggro#Good_vs_Bad_Aggro bad aggro], making them unable to be balled, slowing the run down, or failing. |
||
**Do not stop and get a chest on the way, you can get it afterwards. |
**Do not stop and get a chest on the way, you can get it afterwards. |
||
| − | *After you aggro the last group you want to place your {{skill pvxicon|Shadow of Haste}} as close to this spot as possible. |
+ | *After you aggro the last group you want to place your {{skill pvxicon|Shadow of Haste}} as close to this spot as possible. |
| + | **If you are slow getting to the SoH spot, go ahead and recast Deadly Paradox and Shadow Form before placing your SoH. |
||
| ⚫ | *Keep running and turn right into the little cove (where [https://wiki.guildwars.com/wiki/Wajjun_Bazaar#Collectors Naiju] can possibly be) and run to the far corner to pull the mantid monks around the corner. Then head back left until you get around this area or until the mantid monks ball up perfectly. |
||
| + | [[Image:Mantidfarmsoh1.jpg| 600px]] |
||
| ⚫ | *Keep running and turn right into the little cove (where [https://wiki.guildwars.com/wiki/Wajjun_Bazaar#Collectors Naiju] can possibly be) and run to the far corner to pull the mantid monks around the corner. Then head back left until you get around this area or until the mantid monks ball up perfectly. |
||
**Recast {{skill pvxicon|Shadow Form}} whenever you need to, but try to do it as late as possible. |
**Recast {{skill pvxicon|Shadow Form}} whenever you need to, but try to do it as late as possible. |
||
**Do NOT use any stance during this, even to recast your SF as it will then cancel your SoH. |
**Do NOT use any stance during this, even to recast your SF as it will then cancel your SoH. |
||
| + | [[Image:Mantidfarmsoh2.jpg| 600px]] |
||
*Once you have pulled to around this area and have made sure the mantid monks are balled. Go ahead and recast {{skill pvxicon|Dwarven Stability}} and then use {{skill pvxicon|Natural Stride}} to jump back to your SoH spot. Make adjustmants quickly to make sure the ball is good then wait until all of the mantid necromancers are settled, then run in and use {{skill pvxicon|Whirling Defense}} once you are in the middle of them all. |
*Once you have pulled to around this area and have made sure the mantid monks are balled. Go ahead and recast {{skill pvxicon|Dwarven Stability}} and then use {{skill pvxicon|Natural Stride}} to jump back to your SoH spot. Make adjustmants quickly to make sure the ball is good then wait until all of the mantid necromancers are settled, then run in and use {{skill pvxicon|Whirling Defense}} once you are in the middle of them all. |
||
| + | **If you are fast enough you can cast Deadly Paradox instead of Natural Stride to jump back and give your Shadow Form more time. |
||
| − | ** |
||
*As soon as you use Whirling, go ahead and cast your {{skill pvxicon|Edge of Extinction}} exactly where you are standing. Wait until everything is dead, then pick up your drops and go get any chests that might have spawned. |
*As soon as you use Whirling, go ahead and cast your {{skill pvxicon|Edge of Extinction}} exactly where you are standing. Wait until everything is dead, then pick up your drops and go get any chests that might have spawned. |
||
| + | **Make sure not to cancel your Whirling stance or move around too much. |
||
</pvxbig> |
</pvxbig> |
||
Revision as of 05:36, 12 November 2017
A/R SoH Mantid Farmer
Equipment
- Weapons
- A spear, axe, or sword (the requirement does not matter) with a 20% of Enchanting grip/pommel and an "I have the power!" inscription. (The spearhead, haft, or hilt doesn't matter as long as it is not Vampiric or Zealous).
- A shield (the requirement does not matter) with a +45 of Devotion shield handle and a +10 "Through Thick and Thin" inscription.
- img
- Armor
- Head piece: +1 Shadow Arts with a +3 Rune of Superior Shadow Artsalso with an Infiltrator's Insignia.
- Chest: Rune Of Superior Vigor, with an Infiltrator's Insignia.
- Hands: Rune Of Attunement, with an Infiltrator's Insignia.
- Legs: Rune Of Attunement, with an Infiltrator's Insignia.
- Feet: Rune Of Attunement, with an Infiltrator's Insignia.
- Consumables
- Lockpicks - chests have a chance to spawn in a few places in the farm area.
Guide
- As soon as you zone in use
 Dwarven Stability and then
  Natural Stride and head towards the mantids. Use a second
  Natural Stride as soon as it is off cooldown. Before the second one ends you will be in range of the mantids.
 - Stop before aggroing them and use
 Shroud of Distress ,
  Deadly Paradox , and then
  Shadow Form .
 - Then recast
 Natural Stride and start grabbing the groups.
- You should have no problem getting there fast enough, but if you are too slow getting there (possible disconnect, maybe AFK, or if you died once already), the mantid groups could start getting bad aggro, making them unable to be balled, slowing the run down, or failing.
- Do not stop and get a chest on the way, you can get it afterwards.
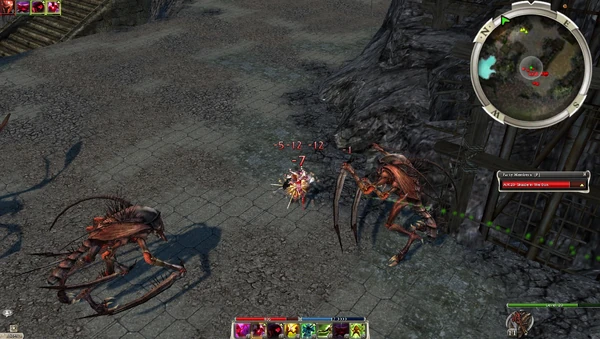
- After you aggro the last group you want to place your
 Shadow of Haste as close to this spot as possible.
- If you are slow getting to the SoH spot, go ahead and recast Deadly Paradox and Shadow Form before placing your SoH.
- Keep running and turn right into the little cove (where Naiju can possibly be) and run to the far corner to pull the mantid monks around the corner. Then head back left until you get around this area or until the mantid monks ball up perfectly.
- Recast
 Shadow Form whenever you need to, but try to do it as late as possible.
 - Do NOT use any stance during this, even to recast your SF as it will then cancel your SoH.
- Recast
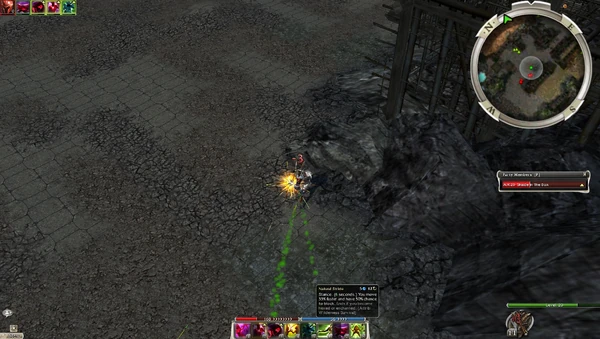
- Once you have pulled to around this area and have made sure the mantid monks are balled. Go ahead and recast
 Dwarven Stability and then use
  Natural Stride to jump back to your SoH spot. Make adjustmants quickly to make sure the ball is good then wait until all of the mantid necromancers are settled, then run in and use
  Whirling Defense once you are in the middle of them all.
- If you are fast enough you can cast Deadly Paradox instead of Natural Stride to jump back and give your Shadow Form more time.
- As soon as you use Whirling, go ahead and cast your
 Edge of Extinction exactly where you are standing. Wait until everything is dead, then pick up your drops and go get any chests that might have spawned.
- Make sure not to cancel your Whirling stance or move around too much.


