@DeletedUser41319527 (talk | contribs) |
mNo edit summary |
||
| (38 intermediate revisions by 10 users not shown) | |||
| Line 1: | Line 1: | ||
| − | {{ |
+ | {{Real-Vetting|rating=great|farming}} |
| − | {{ |
+ | {{TOC|pos=r}} |
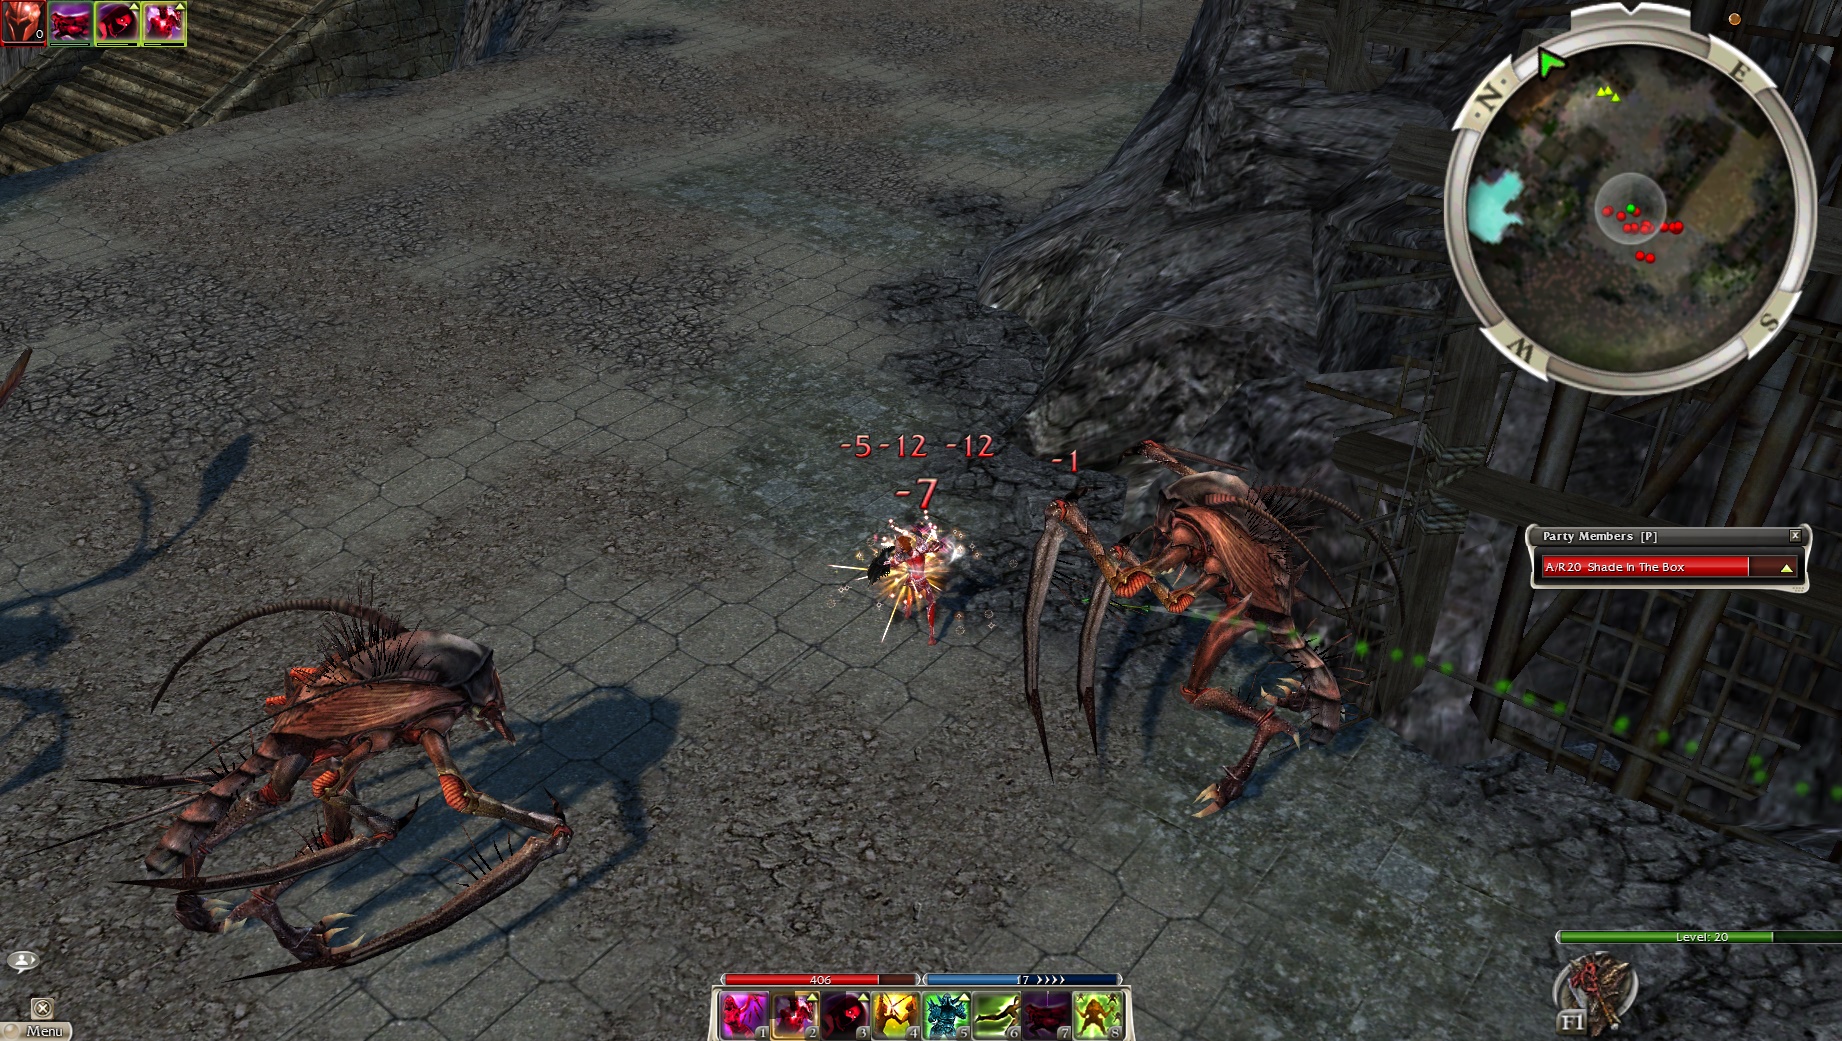
| + | This is a build designed to farm [[gww:Mantid|Mantids]] outside [[gww:Nahpui Quarter|Nahpui Quarter]]. It is effective at killing Mantids even at rank 0 Expertise, as an Assassin. |
||
| ⚫ | |||
| + | |||
| ⚫ | |||
<pvxbig> |
<pvxbig> |
||
| − | [build prof=A/R sha= |
+ | [build prof=A/R sha=11+1+3 bea=10 wild=10][Deadly Paradox][Shadow Form][Shroud of Distress][Whirling Defense][Dwarven Stability][Natural Stride][Shadow of Haste][Edge of Extinction][/build] |
| ⚫ | |||
| − | *{{skill pvxicon|Optional}} an be anything you prefer to help increase damage such as: |
||
| − | **{{skill pvxicon|Cry of Pain}} for wide AoE rupt, damage, and degen. |
||
| − | **{{skill pvxicon|Ebon Battle Standard of Honor}} for faster boss killing by using this and then daggers, and for using a scythe to get some more AoE damage and for smaller groups. |
||
</pvxbig> |
</pvxbig> |
||
| − | ====Equipment==== |
||
| ⚫ | |||
| − | **A staff, preferably a domination staff for better auto attacks, with a [https://wiki.guildwars.com/wiki/Insightful +5 energy staff head] , [https://wiki.guildwars.com/wiki/Of_Enchanting Staff Wrapping of Enchanting] , and [https://wiki.guildwars.com/wiki/Inscription#Have_Faith "Have Faith" inscription] for +5 energy while enchanted. (Take a little more damage with this but better for casting or if you need emergancy energy). |
||
| − | **A martial weapon with 20% longer enchantment mod and an inscription "I Have The Power" for +5 energy. (The other mod does'nt matter, better to not have one). This combined with a shield that has a shield handle with +45 health while enchanted and an inscription "Leaf on the Wind" for +10 armor vs cold. |
||
| − | ** Req 9 Daggers with 20% longer enchantment mod, Zealous or Vampiric depending on if you have energy issues or want to do more damage, and +5 energy inscription. |
||
| − | **Scythe with 20% longer enchantment mod, Zealous or Vampiric depending on if you have energy issues or want more damage with autos, and +5 energy inscription. |
||
| ⚫ | |||
| − | **Head piece: +1 Shadow Arts with a +3 [https://wiki.guildwars.com/wiki/Rune_of_Shadow_Arts Rune of Superior Shadow Arts]also with a [https://wiki.guildwars.com/wiki/Blessed_Insignia Blessed Insignia]. |
||
| − | **Chest: [https://wiki.guildwars.com/wiki/Rune_of_Vigor Rune Of Superior Vigor], with a [https://wiki.guildwars.com/wiki/Blessed_Insignia Blessed Insignia]. |
||
| − | **Hands: [https://wiki.guildwars.com/wiki/Rune_of_Attunement Rune Of Attunement], with a [https://wiki.guildwars.com/wiki/Blessed_Insignia Blessed Insignia]. |
||
| − | **Legs: [https://wiki.guildwars.com/wiki/Rune_of_Attunement Rune Of Attunement], with a [https://wiki.guildwars.com/wiki/Blessed_Insignia Blessed Insignia]. |
||
| − | **Feet: [https://wiki.guildwars.com/wiki/Rune_of_Attunement Rune Of Attunement], with a [https://wiki.guildwars.com/wiki/Blessed_Insignia Blessed Insignia]. |
||
| − | *Pcons |
||
| − | **Can use a [https://wiki.guildwars.com/wiki/Birthday_Cupcake Cupcake] if you want to, most agro will not break, however some elementals will not follow well. |
||
| − | **No need for any other pcons. This part can even be done in HM alone with out any cons or pcons easily. |
||
| − | == |
+ | ==Equipment== |
| ⚫ | |||
| − | *Skill usage:<pvxbig> |
||
| + | ** A spear, axe, or sword (the requirement does not matter) with a 20% [[gww:Of_Enchanting|of Enchanting]] mods and an [[gww:Inscription#Combat_enhancing|"I have the power!"]] inscription. (The spearhead, haft, or hilt doesn't matter as long as it is not [[gww:Vampiric|Vampiric]] or [[gww:Zealous|Zealous]]). |
||
| − | **Maintain {{skill pvxicon|Shadow Form}} and {{skill pvxicon|Shroud of Distress}} at all times. |
||
| + | ** A shield (the requirement does not matter) with a +45 [[gww:Of_Devotion|of Devotion]] shield handle and a +10 [[gww:Inscription#Through_Thick_and_Thin|"Through Thick and Thin"]] inscription. |
||
| − | **Before spiking a ball, cast {{skill pvxicon|Channeling}} for energy during the spike. |
||
| + | |||
| − | **To spike, cast {{skill pvxicon|Arcane Echo}} and {{skill pvxicon|Wastrel's Demise}} on as many targets as quickly as possible as you can by using the tab key. |
||
| ⚫ | |||
| − | **Use {{skill pvxicon|Empathy}} and {{skill pvxicon|"Finish Him!"}} on enemies outside of the ball and for killing [https://wiki.guildwars.com/wiki/Dazehl_Brainfreezer Dazehl.] |
||
| + | ** A +3 [[gww:Rune_of_Shadow_Arts|Rune of Superior Shadow Arts]] on the +1 Shadow Arts headpiece. |
||
| − | **Make sure to put your {{skill pvxicon|Optional}} skill to good use. </pvxbig> |
||
| + | ** [[gww:Rune_of_Vigor|Rune Of Superior Vigor]] with full [[gww:Rune_of_Attunement|Runes Of Attunement]]. |
||
| − | *Route and map: |
||
| + | ** Full [[gww:Infiltrator%27s_Insignia|Infiltrator's Insignias]]. Ranger variant should use full Survivior Insignias instead. |
||
| − | **[[Image:Ice Lake Solo 1.jpg| right]]Run down and grab the pink shrine and make your way to the south lake. Make sure to look at the vaettir spawn map so you do not pop any vaettir when grabbing imps. If you do pop any vaettir along your way leave them for the berserk duo. The will be a patrolling group of minotaurs on the south side of the lake. Make sure to not grab them or you will die. To ball ice imps and elementals together, you must first ball the ice imps, then pull the elementals into them. Elementals have half the attack range ice imps do. Once the imps are balled just run through them and watch closely as the elementals pull into them. Make your way around the lake counter clock wise to avoid the vaettir spawns on the west side. Once you get all the way around grab the green shrine and make sure any imps fighting modniir die before heading to the north lake. Ignore any modniir you might encounter. Once you get to the north lake start balling the imps and elementals and make your way north. Make sure to kill the small group of imps at the top of the lake by the yellow shrine. If you miss any imps the boss will not spawn. Go ahead and grab the yellow shrine and make your way to the purple shrine. By the time you grab the purple shrine there should only be one group of imps left in the corner by the cave. Grab them and pull them out because where you intially grab them is where the boss spawn is and you do not want to aggro him yet. Once you kill the small group the boss group will spawn (if he does not then you missed an imp somewhere around one of the lakes), ignore him and go into the cave. Grab everything in the cave in one pull and spike it. You can then grab the orange shrine and head back to the boss group and kill it. Then you are done. You can go help other teams or grab any of the blue shrines left or ones you did not grab before. [https://wiki.guildwars.com/wiki/Asterius_the_Mighty Asterius] may patrol all the way over to the green shrine, if you see him, do not engage him, he will die on his own and will kill you if you agro him. |
||
| + | |||
| − | *Video |
||
| + | ==Usage== |
||
| − | ** |
||
| + | <pvxbig> |
||
| + | *As soon as you zone in use {{skill pvxicon|Dwarven Stability}} and then {{skill pvxicon|Natural Stride}} and head towards the mantids. Use a second {{skill pvxicon|Natural Stride}} as soon as it is off cooldown. Before the second one ends you will be in range of the mantids. |
||
| + | *Stop before aggroing them and use {{skill pvxicon|Shroud of Distress}}, {{skill pvxicon|Deadly Paradox}}, and then {{skill pvxicon|Shadow Form}}. |
||
| + | *Then recast {{skill pvxicon|Natural Stride}} and start grabbing the groups. |
||
| + | **You should have no problem getting there fast enough, but if you are too slow getting there (possible disconnect, maybe AFK, or if you died once already), the mantid groups could start getting [[scw:Aggro#Good_vs_Bad_Aggro|bad aggro]], making them unable to be balled, slowing the run down, or failing. |
||
| + | **Do not stop and get a chest on the way, you can get it afterwards. |
||
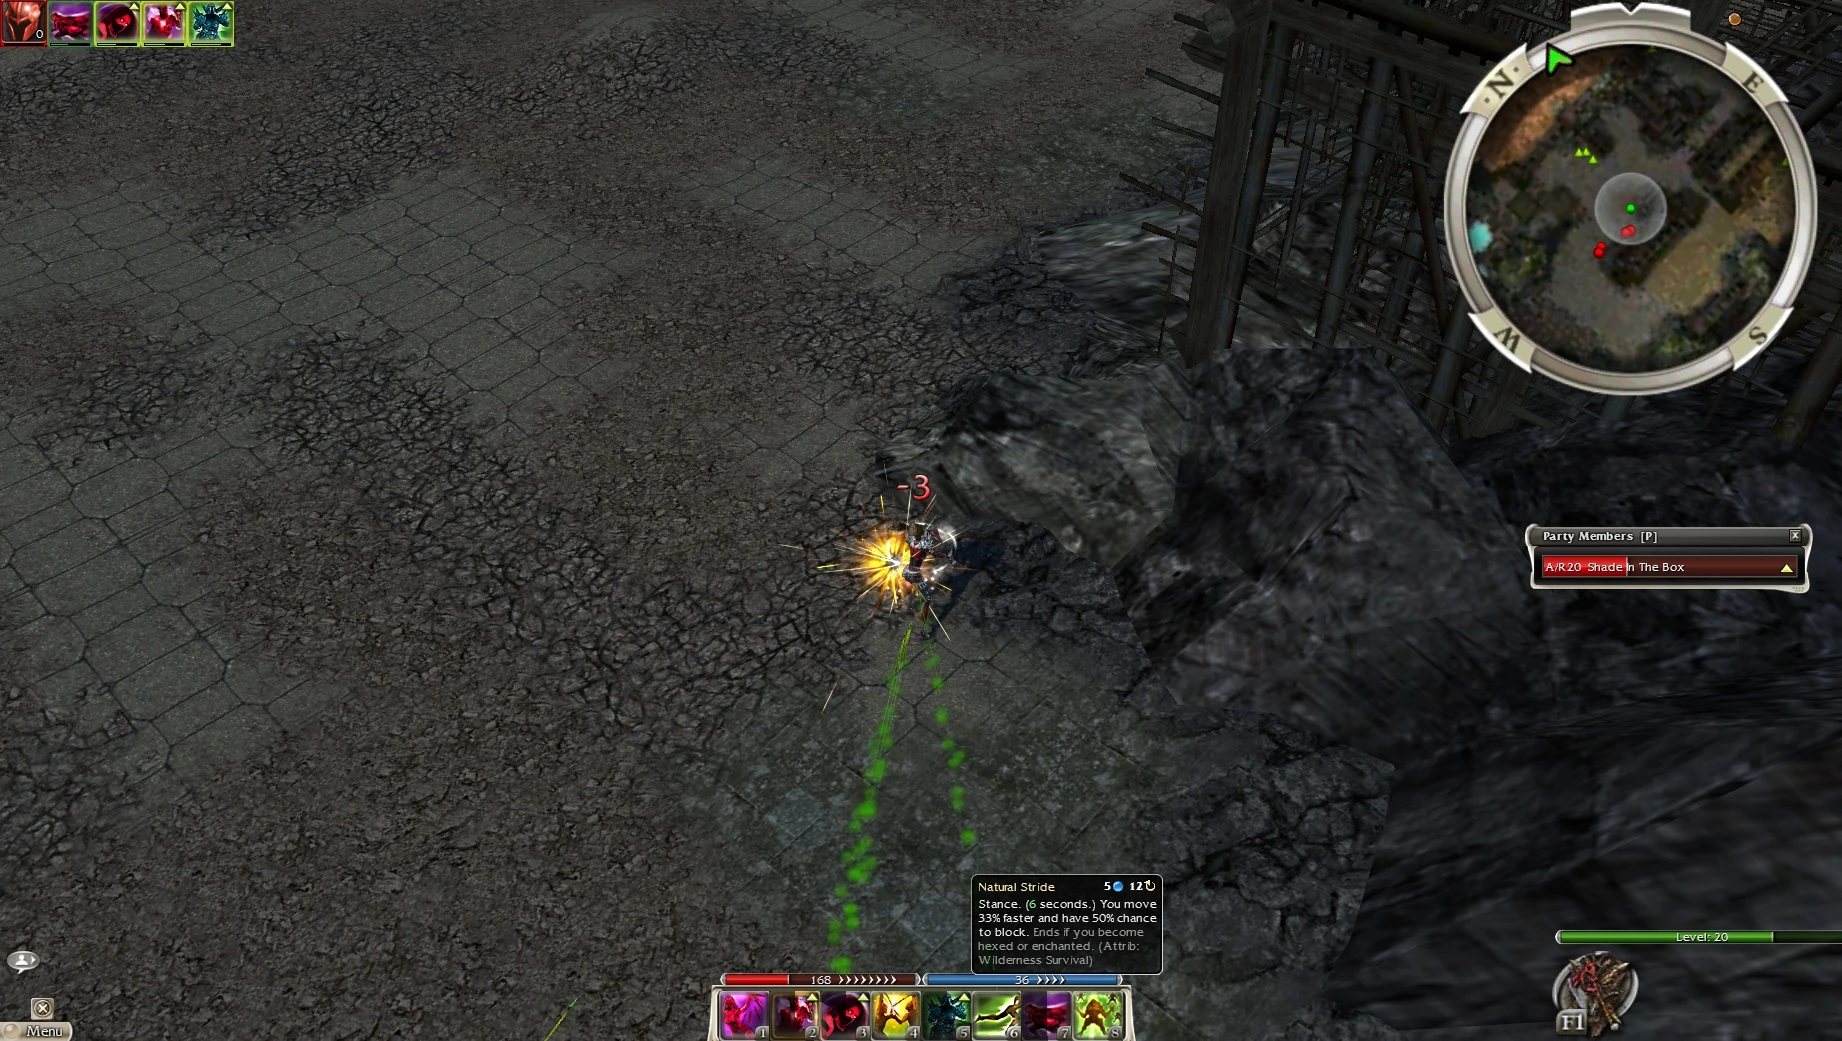
| + | *After you aggro the last group you want to place your {{skill pvxicon|Shadow of Haste}} as close to this spot as possible. |
||
| + | **If you are slow getting to the SoH spot, go ahead and recast Deadly Paradox and Shadow Form before placing your SoH. |
||
| + | [[Image:Mantidfarmsoh1.jpg| 600px]] |
||
| + | *Keep running and turn right into the little cove (where [[gww:Wajjun_Bazaar#Collectors|Naiju]] can possibly be) and run to the far corner to pull the mantid monks around the corner. Then head back left until you get around this area or until the mantid monks ball up perfectly. |
||
| + | **Recast {{skill pvxicon|Shadow Form}} whenever you need to, but try to do it as late as possible. |
||
| + | **Do NOT use any stance during this, even to recast your SF as it will then cancel your SoH. |
||
| + | [[Image:Mantidfarmsoh2.jpg| 600px]] |
||
| + | *Once you have pulled to around this area and have made sure the mantid monks are balled. Go ahead and recast {{skill pvxicon|Dwarven Stability}} and then use {{skill pvxicon|Natural Stride}} to jump back to your SoH spot. Make adjustmants quickly to make sure the ball is good then wait until all of the mantid necromancers are settled, then run in and use {{skill pvxicon|Whirling Defense}} once you are in the middle of them all. |
||
| + | **If you are fast enough you can cast Deadly Paradox instead of Natural Stride to jump back and give your Shadow Form more time. |
||
| + | *As soon as you use Whirling, go ahead and cast your {{skill pvxicon|Edge of Extinction}} exactly where you are standing. Wait until everything is dead, then pick up your drops and go get any chests that might have spawned. |
||
| + | **Make sure not to cancel your Whirling stance or move around too much. |
||
| + | </pvxbig> |
||
| + | |||
| + | ==Notes== |
||
| + | * It is recommended that Lockpicks are taken as there is a chance chests will spawn in the area. These chests have the ability to drop [[gww:Gallery_of_Celestial_weapons|Celestial Weapons]]. |
||
| + | * The Ranger variant will kill the Mantids faster, but requires more practice due to taking more damage and giving less leeway with Shadow Form casts. |
||
| + | ==Videos== |
||
| + | {| |
||
| + | |- |
||
| + | |<big>'''A/R Mantid Farmer Guide'''</big><br /> |
||
| + | {{#widget:YouTube|id=y8CUgS7XgS8}} |
||
| + | |<big>'''R/A Mantid Farmer Guide'''</big><br /> |
||
| + | {{#widget:YouTube|id=rIJh7I55FxI}} |
||
| + | |} |
||
| + | |||
| + | == See also == |
||
| ⚫ | |||
| + | * [[Build:R/A Whirling Defense Farmer]] |
||
| + | |||
| + | {{FarmCat|celestial=yes|profa=yes}} |
||
Revision as of 23:44, 3 December 2020
|
The PvXwiki community finds this to be a great build. This build has received an overall rating in the range from 4.75 to 5.0 and thus qualifies for the highest category of working builds: Great. This build has been designed for the following use: |
This is a build designed to farm Mantids outside Nahpui Quarter. It is effective at killing Mantids even at rank 0 Expertise, as an Assassin.
Attributes and Skills


Equipment
- Weapons
- A spear, axe, or sword (the requirement does not matter) with a 20% of Enchanting mods and an "I have the power!" inscription. (The spearhead, haft, or hilt doesn't matter as long as it is not Vampiric or Zealous).
- A shield (the requirement does not matter) with a +45 of Devotion shield handle and a +10 "Through Thick and Thin" inscription.
- Armor
- A +3 Rune of Superior Shadow Arts on the +1 Shadow Arts headpiece.
- Rune Of Superior Vigor with full Runes Of Attunement.
- Full Infiltrator's Insignias. Ranger variant should use full Survivior Insignias instead.
Usage
- As soon as you zone in use
 Dwarven Stability and then
  Natural Stride and head towards the mantids. Use a second Natural Stride as soon as it is off cooldown. Before the second one ends you will be in range of the mantids.
 - Stop before aggroing them and use
 Shroud of Distress , Deadly Paradox , and then Shadow Form .
 - Then recast Natural Stride and start grabbing the groups.
- You should have no problem getting there fast enough, but if you are too slow getting there (possible disconnect, maybe AFK, or if you died once already), the mantid groups could start getting bad aggro, making them unable to be balled, slowing the run down, or failing.
- Do not stop and get a chest on the way, you can get it afterwards.
- After you aggro the last group you want to place your Shadow of Haste as close to this spot as possible.
- If you are slow getting to the SoH spot, go ahead and recast Deadly Paradox and Shadow Form before placing your SoH.
- Keep running and turn right into the little cove (where Naiju can possibly be) and run to the far corner to pull the mantid monks around the corner. Then head back left until you get around this area or until the mantid monks ball up perfectly.
- Recast Shadow Form whenever you need to, but try to do it as late as possible.
- Do NOT use any stance during this, even to recast your SF as it will then cancel your SoH.
- Recast
- Once you have pulled to around this area and have made sure the mantid monks are balled. Go ahead and recast Dwarven Stability and then use Natural Stride to jump back to your SoH spot. Make adjustmants quickly to make sure the ball is good then wait until all of the mantid necromancers are settled, then run in and use Whirling Defense once you are in the middle of them all.
- If you are fast enough you can cast Deadly Paradox instead of Natural Stride to jump back and give your Shadow Form more time.
- As soon as you use Whirling, go ahead and cast your Edge of Extinction exactly where you are standing. Wait until everything is dead, then pick up your drops and go get any chests that might have spawned.
- Make sure not to cancel your Whirling stance or move around too much.
Notes
- It is recommended that Lockpicks are taken as there is a chance chests will spawn in the area. These chests have the ability to drop Celestial Weapons.
- The Ranger variant will kill the Mantids faster, but requires more practice due to taking more damage and giving less leeway with Shadow Form casts.
Videos
| A/R Mantid Farmer Guide {{#widget:YouTube|id=y8CUgS7XgS8}} |
R/A Mantid Farmer Guide {{#widget:YouTube|id=rIJh7I55FxI}} |